Feeds:
Posts
Comments

Posts Tagged ‘52 weeks’

In the words of Boston’s Tom Scholz, “It’s been such a long time, I think I should be goin’, yeah”. In this case, such a long time is just over 4 months. To say the very least, the end of 2017 was incredibly hectic for me. Insanely busy days at work, coupled with the stress of moving yet again (for anyone keeping, this makes the 7th time I’ve moved in the past 5 years), and some latent mental health issues I’d been avoiding. But I’m presently doing better than I have in a long time. There’s still bad days, and there always will be, but the good ones are gradually outnumbering them; At the end of the day, that’s really the best you can hope for.

I think, generally speaking, when it comes to writing, I work best when given a ballpark to play in. By that, I mean that it sometimes seems difficult for me to come up with something that really interests me or grabs my attention. I enjoy such a wide variety of things, that it’s hard to pick one thing and run with it. It’s similar to my reaction when folks ask me “Oh, you’re a chef, what’s your favorite thing to cook?”. I honestly never have a good answer. Usually my response is something along the lines of “anything that doesn’t suck”.

This week I wandered back into the 52 Weeks of Cooking challenge (surprise, surprise), and was greeted with a conundrum. First theme: New to You. Fuck. Having cooked professionally my entire life, I’ve seen, done and experienced an insane amount of what the food world has to offer. That’s not to say there isn’t always something new to see, do, or experience, but it puts me back in the position of trying to pinpoint what’s going to be it.

This week has been monstrously cold in Vermont. Like, -24 goddamn degrees before the wind chill. With that in mind, I knew I wanted to do something warm, a bit hearty. For whatever reason, my mind jumped to a recipe that I had wanted to try for years, but never got around to it. I’ve made no secret of the fact that I’m a huge nerd. One thing that I’ve never really touched on on C&K is my love for the Legend of Zelda series. It was one of the first games I can remember playing, and I’ve loved the series from the get-go. The cooking mechanic introduced in Breath of the Wild brought in a lot of cool possibilities for translating the in-game foods into actual dishes. But the dish I was interested in didn’t come from this newest instalment, but instead from more than a decade earlier: Yeto’s Superb Soup from Twilight Princess.

IMG-7377

In Twilight Princess, Link’s quest takes him to the frigid summit of Snowpeak, in the northern province of Hyrule.  There, Link meets Yeto, a yeti, who lives with his wife Yeta in the ruins of a great mansion. Yeta is sick, and Yeto tasks link with helping to make a soup in order to heal her. There’s a lot more detail I’d love to go into about how this part of the game is really awesome, but for now we’ll focus on the soup.

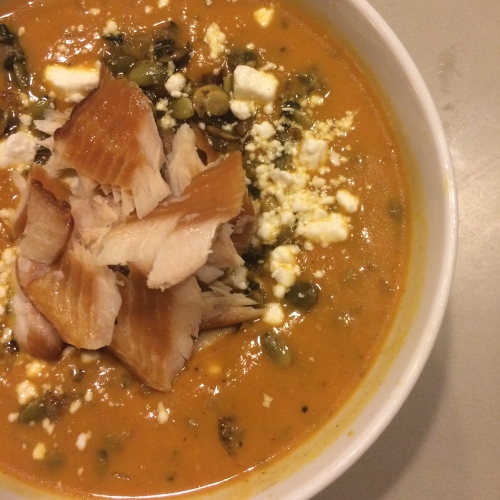
The “Simple” version of the soup is broth-based, with the Hylian Reekfish featuring as the main ingredient. The addition of an Ordon Pumpkin makes the soup “Good”, and a final addition of Ordon Goat Cheese brings it to “Superb”. Working off these basic parameters, it’s fairly easy to translate into a working recipe.

Thick, hearty, and gut-filling, this soup was just what I needed for the bone-chilling weather we’ve been stuck with lately.

Yeto’s Superb Soup
serves 2

  • Butter, 6 tablespoons, divided
  • Vidalia Onion, 1 each
  • Sage, 1/2 bunch
  • Pumpkin, 1 can*
  • Chicken or Fish Stock, about 3 cups
  • Goat Cheese, crumbled, 4oz, divided
  • Kosher Salt, to taste
  • Black Pepper, ground, to taste
  • Garlic Powder, to taste
  • Pumpkin Seed, about 1/4 cup
  • Smoked Trout, 1 filet**

In a medium sauce pot, melt butter over medium heat. Peel and finely dice onion. Add 3/4 of the onion to the pot and cook until softened, about 4 minutes. Mince sage and add half to cooked onions, cooking about 1 minute. Add pumpkin and cook until it begins to brown, about 5 minutes. Add stock, whisking to combine. Bring to a simmer and add half of the goat cheese. Continue simmering until cheese is melted. Season to taste with salt, pepper and garlic.

In a separate saute pan, melt remaining butter over medium-high heat. Add remaining onions and sage. Cook until onions begin to brown, about 6 minutes. Add pumpkin seeds and cook until toasted, about 2 minutes.

Garnish soup with pumpkin seed mixture and flaked trout.

*Make sure you get 100% pumpkin and not a pumpkin pie mix

**The Hylian Reekfish is actually based on the Coho Salmon, but in my head there’s no way they’re keeping fresh fish on a snow-and-ice-covered mountain top. Yeto probably would have smoked or cured any fish that he caught.


Read Full Post »

We’ve all been there. And before I even describe what I mean by that, you might already have an idea, judging solely from the title. The picture I’m about to paint for you doesn’t point to any one occasion specifically, but it’s certainly a little autobiographical

Normally, we put a good amount of work into planning a party, shindig, get-together, whatever you want to call it. Stock up on booze (also non-alcoholic drinks, but come on), collect firewood, make sure lawn chairs are a thing that exist, get a playlist together with as much death metal as you think you can actually get away with, all the essentials. As anyone could expect, snacks play a crucial role in all social gatherings, large and small. I tend to lean on the side of spending the day/morning of the party getting some really good munchies togethers. Maybe it’s your famous chicken wings, maybe it’s a crock pot full of cocktail franks and barbecue sauce (my mom also adds grape jelly, but that’s beside the point); The point being that when you’re hosting company, you normally go a bit above and beyond on your snack game.

Music is finally playing after a solid hour of figuring out what’s wrong with the Bluetooth on your phone; Friends, family, coworkers or a mix of all three start slowly trickling in; The designated bin for empties begins it’s inevitable overflow; Somebody “definitely doesn’t mind being that guy” and is the first to hit the food table. As the evening goes on, the fire is lit (not in the way that kids these days mean) and the excitement and attendance both start to dwindle. Conversations will either turn to that shitty thing that happened at work last week, or some kind of political conversation that you’re all already on the same side of. The witching hour draws near, somebody is passed out on a chair or a couch, and you decide that everything can get picked up in the morning even though you swore you’d deal with it then and there. As you finally make your way to bed, you take one last peek at the food table and wonder who brought this or that before grabbing one last bite and stumbling off.

That last moment of “fuck it, why not?” is what I wanted to hone in on this week. That one perfect bite that still tastes good after way longer at outdoor temperatures than it’s ever meant to be and after more alcohol than your ever should have.

IMG_6182

7 Layer Dip, one of the all-time classic when it comes to summertime parties. An amalgamation of all things vaguely Tex-Mex, you can pretty much build your dip however you like: Something meaty, something starchy, a couple spicy salsa-like things, cheese, and a good dollop of sour cream for good measure. Note: NEVER build your dip in a beaker. It was really the only way I could think to get a good shot of all the layers, but it made it borderline impossible to actually eat.

7 Layer Dip, all recipes adapted from Modernist Cuisine
makes 1 big-ass dip

Pork Carnitas

  • Pork shoulder, cubed, 650g
  • Beef Stock, 230g or 1 cup
  • Achiote Paste, 1.5 teaspoon
  • Adobo Sauce (from a can of Chipotles), .5 teaspoon

Combine pork and stock in a pressure cooker. Seal and set to 15psi. Cook for 30 minutes once full pressure has been reached. Let pressure release naturally, or run cool water over the lid. Strain pork from liquid, reserving liquid. In a small pot, combine cooking liquid, achiote and adobo. Cook until thick, 5-7 minutes. Toss pork with glaze, shredding as you go.

Refried Beans

  • Beef Stock, 1200g or 2qt
  • Pinto Beans, dried, 1lb
  • Pork Fat or butter, 30g

Combine ingredients in a pressure cooker. Seal and set to 15psi. Cook for 60 minutes once full pressure has been reached. Let pressure release naturally, or run cool water over the lid. Transfer beans and liquid to a food processor and process until smooth, add water as needed.

Pico de Gallo

  • Tomato, diced, 125g
  • Red Onion, minced, 50g
  • Jalapeno, minced, 5g (seeds optional)
  • Cilantro, minced, 3g
  • Juice of 1 lime
  • Kosher Salt, to taste

Combine all ingredients. Season to taste with salt.

Queso

  • Beer or Water, 69g
  • Sodium Citrate, 8g
  • Pepper Jack Cheese, grated, 8oz

In a medium pot, combine beer or water and sodium citrate. Bring to a simmer over medium heat. Add cheese in small batches, whisking until fully melted between additions.

To Assemble

In a large baking dish or pie plate, layer carnitas, refried beans, mashed avocado or guacamole, pico de gallo, queso, and sour cream, topping with a layer of scallions, parsley, cilantro, or a mixture of herbs.

Read Full Post »

So as you may or may not have noticed, I’ve haven’t really written anything in over a month now. It’s not that I haven’t wanted to; Writing has always given me a good way to de-stress and get my ideas out on the page when my brain works faster than I’d like it to. Work has just gotten super busy lately, and pretty much all of my free time has been taking up just trying to recuperate. On the plus side, being busy at work is something I really enjoy, and not something I’ve had since moving from the Burlington area last fall, so it’s nice to have that rush of adrenaline back into my daily routine. But I’ve been kicking myself for not keeping up with getting things written. I’ve still been plugging away at Reddit’s 52 Weeks of Cooking Challenge and if you’ve been following along on Instagram or Facebook, I’ve had some fun working up some recipes with Berries, Garlic, and Vanilla, as well as some Dim Sum and Charcuterie.

This week was an especially fun theme for the challenge: Inspired by Magic. This year we celebrated the 20th anniversary of the release of Harry Potter & The Philosopher’s Stone in the UK, and on Monday the Boy Who Lived celebrated his 37th birthday. Growing up, I was immediately enthralled by the series. Vast, fantastic landscapes and settings, deep character development, and the exploration of ideas and lessons that still resonate to this day. I want to get a big, non-food-related piece written for the US 20th anniversary next year, but that’s still quite a way away.

The wizarding world is full of amazing foods; Pumpkin Pasties, Cauldron Cakes, Treacle Tarts, chocolates, candies, you name it. I’ve never had a super strong arsenal of dessert recipes, but in the past year or two I’ve definitely made some leaps and bounds. While desserts would have been a fairly easy route to go, I dug deep for a cool recipe that would kind of push my boundaries in a different direction.

The morning of Halloween, 1492, Sir Nicholas de Mimsy-Porpington was set to be executed, having attempted to cast a tooth-straightening spell on an assistant of King Henvry VII the previous evening. After 47 hacks into his neck with a blunt axe, Sir Nicholas’ head was left dangling from his body by no more than an inch of flesh. Returning as a ghost, “Nearly-Headless” Nick took up residence as the ghost of Gryffindor Tower at Hogwarts School of Witchcraft & Wizardry.

To commemorate his 500th Deathday, Sir Nicholas held a party and feast in “one of the roomier dungeons” at Hogwarts, inviting the main trio of Harry, Ron, and Hermione, as well as a host of notable deceased: the Bloody Baron, the Fat Friar, the Grey Lady, the Wailing Widow, Peeves and Moaning Myrtle. It would go without saying that ghosts can’t eat or taste food, so the menu consisted of food smelling so foul they could almost taste it: Moldy bread, stinking salmon, fungus-covered peanuts, and the pièce de résistance, Maggoty Haggis.

IMG_6108

Haggis is one of those dishes that, whether or not you’ve eaten it, you’d probably assume is super disgusting. It kind of has that reputation of being a bunch of gross things (organ meats) stuffed into an even grosser thing (stomach) and cooked for a thousand years. I was lucky enough to get a bunch of offal from Howvale Farm, so I figured it was time to finally try this out for myself.

When it comes down to it, haggis is largely similar to black pudding: a loosely bound meat sausage with oats. I took lamb heart, liver and tongue and simmered them in a bit of beef stock until tender, then ground it together with some onion and spices. Oats and the cooking liquid bring it together into a workable dough (I don’t know if that’s the word I mean). Not having a stomach to stuff the mixture into, I baked it off like a meatloaf until browned and crispy.

Admittedly, I was certain that this was going to be as gross as it’s always made out to be. But one bite in and I was singing a different tune. Super savory, fatty, and delicious; Imagine if your favorite meatloaf had a baby with leftover Thanksgiving stuffing. As far as the “maggoty” aspect goes, I had a package of barbecue-seasoned larva that I got for Christmas, which provided a nice salty crunch. Now that I know how great this dish itself is, I think I’m going to start looking for a stomach to try it again.

Haggis
makes 1 loaf

  • Liver*, 8 ounces
  • Heart*, 8 ounces
  • Tongue*, 8 ounces
  • Beef Stock, 2 quarts
  • Vidalia Onion, 4 each
  • Pork Lard or Beef Suet, 8 ounces, diced
  • Rolled Oats (not instant), 8 ounces
  • Sage, dried, 1 tablespoon
  • Allspice, ground, 2 tablespoons
  • Coriander, ground, 2 teaspoons
  • Kosher Salt & ground Black Pepper, to taste
  • Maggots, to garnish (optional)

Preheat oven to 425F. In a medium-sized pot, combine heart, liver, tongue, 1 chopped onion and beef stock. Bring to a simmer and cook until tender. Remove meat from stock. Roughly chop heat and liver. Remove membrane from tongue and roughly chop. Process meat, 3 chopped onions and fat through medium die of a meat grinder**. Add oats and spices to meat mixture, seasoning to taste with salt and pepper. Add enough cooking liquid to the mixture to form a workable dough. Line a baking sheet with foil and lightly grease. Transfer meat mixture to baking sheet and form into a tight loaf. Bake at 425F 20-25 minutes. Remove from heat and allow to cool slightly before slicing and serving.

*Organ meats from any animal can be used, but you want about 1.5lb total
**If you don’t have a meat grinder, you can also coarsly grind using a food processor


Read Full Post »

I’ve eaten many pizzas in my quarter century on this planet. I know most people have eaten plenty of pizza, I wouldn’t claim to be unique in that. But I’ve eaten a lot of pizza. When I was a kid, there was almost nothing better than plopping down in front of the TV for Saturday morning cartoons and a Red Baron breakfast pizza (now sadly discontinued). In elementary school, I would long for pizza day in the cafeteria, despite being subject to the rectangular, near-crustless grease bombs. High school got a little better in that regard, upgrading closer to a New York style, complete with optional red pepper flakes and Parmesan. College brought be within spitting distance of NYC,  where I could gorge myself on Ray’s while wandering the unfamiliar terrain. I’ve even spent some time in Italy, sampling the classical Neapolitan style from traditional brick ovens (I will throw it out there the the best pizza I had was at a small shop in the town square of Siena, and came topped with hot dogs and French fries).

Growing up on the east coast, you pretty much get whatever is frozen at the grocery store, or a version similar to New York-style. While delicious in it’s own right, I’m of the opinion that Deep Dish and Chicago styles are casserole and not pizza, so we won’t touch on that. Since moving last fall, I’ve been making a lot of pizza at home. This largely, if not entirely, due to the local grocery store carrying Everything Bagel pizza dough from Portland Pie Co. They have garlic dough, basil dough, Shipyard Ale dough, but Everything Bagel is the one that really grabbed me. It was months later that I discovered I had been playing in the sandbox that is California-style pizza.

California cuisine came into it’s own in the late 1970’s and early 80’s, and California-style pizza follow shortly after. Popularized by Wolfgang Puck, the style builds from a personal-sized crust with similar structure  to Neapolitan. From there, we throw out the rule book; Any combination of complimentary flavors spanning world cuisines, utilizing farm fresh vegetables and local cheeses, and generally a wide variety of vegetarian and vegan options. When I started making pizzas, my only real goal was to move away from traditional red-sauce-based pies, and I was also trying to work on more vegetarian dishes to save a bit of money on meat; Pretty much falling perfectly into the California style without ever really meaning to.

16228543_1384907291553894_5635585008950312960_n
Mascarpone, Cured Salmon, Red Onion, Capers, Dill (I dream about bagels and lox)

16790086_778822822268193_6768532742377308160_n
Peanut Sauce, Stir-Fry Vegetables, Mozzarella, Scallion, Radish Sprouts

17077589_1738578493138511_8911718064416882688_n
Curry, Cauliflower, Mango Chutney, Cashews, Cilantro

17127289_644094059110834_4049410817253179392_n
Olive Oil, Potato, Tomato, Mint, Ras al Hanout

18644877_1837836836478772_1163627586765455360_n
Butternut Squash, Chickpeas, Broccoli Rabe, Red Onion, Parmesan

17333207_394041167635812_3185024146144755712_n
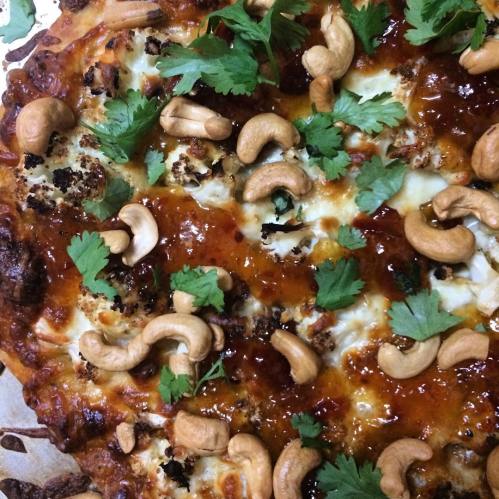
Hoisin, Marinated Tofu, Mixed Pickles, Serrano, Fresh Herbs (A Banh Mi-zza, if you will)

17596000_681461398722981_8388758100517060608_n
White Sauce, Chickpeas, Frank’s Red Hot, Celery, Gorgonzola, Ranch

17662519_277902299319326_2073032442918207488_n
Cheez, Mushrooms, Peppers, Onions, Provolone

17818854_1503369433019112_2247413097297870848_n
Kansas City-style Barbecue, Eggplant, Smoked Gouda, Red Onion, Cilantro

IMG_5730
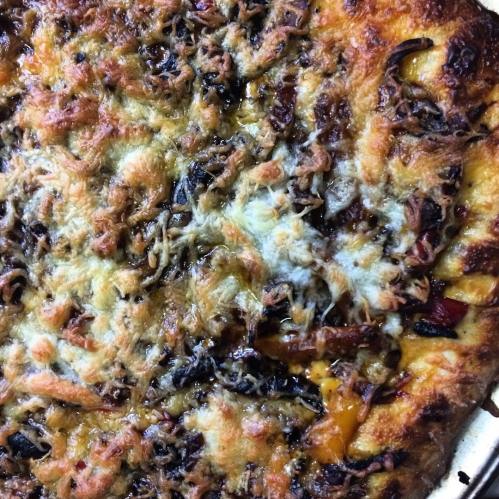
Ricotta & Chevre, Sweet Corn, Maple Bacon, Arugula, Parmesan

Pizza is such a fun concept to play around with and I don’t plan on stopping any time soon. Apparently I’m bad with segues, so here’s 9-year-old Olsen twins rapping about pizza.

Neapolitan Pizza Dough from Modernist Cuisine
Life-Changing Pizza Dough from ChefSteps

Read Full Post »

Sometimes, you find a dish that just clicks; However it works, it works for you.  This brings us, totally unsurprisingly, to what might be my favorite food of all time: The Reuben Sandwich. A few years back I wrote about my love for Reubens. But even before Cabbages & Kings was a thought in my head, I had briefly mentioned the affinity on a much shittier and somehow-less-followed blog I wrote at the time. I could literally go on and on about how much I love this sandwich, but for the sake of brevity I won’t.

What I’m really getting at is that the combination works across near-infinite formats: Pizza, Tacos, Nachos, Egg Rolls, Lasagna. If there’s a dish you can think of, I’m sure somebody has figured out a way to put corned beef, sauerkraut, swiss cheese and Russian dressing on it. Of the countless Reubens and Reuben-adjacent dishes I’ve had, I’ve never had one quite like this.

IMG_5626

Reuben on a stick? Sign me up. As far as food-on-a-stick goes, the classic Corn Dog is pretty run of the mill. Fixing it up into a Reuben taking a bit of extra effort, but it is well worth it.

Corned beef, surprisingly, doesn’t work quite so well on a skewer. Depending on what cut you get, I find it’s either too tender to hold shape well or too tough to get a good bite off while leaving it attached. I opted for kielbasa instead. For the batter, rye and caraway are a no-brainer. Shredded swiss in the batter could work really well, but I didn’t like the way the final product looked, so I nixed it altogether. A little kraut, a little Russian (Thousand Island, only if you insist), and you’re good to go.

Reuben Corn Dogs, adapted from ChefSteps
makes 4

  • Bread Flour, 80g
  • Rye Flour, 80g
  • Granulated Sugar, 66g
  • Cornmeal, finely ground, 25g
  • Kosher Salt, 9 g
  • Caraway Seed, ground, 8g
  • Baking Powder, 3g
  • Egg, beaten, 80g (about 1.5 eggs, beat 2 then measure by weight)
  • Whole Milk, 145g
  • Kielbasa, 4 5-inch lengths
  • Russian Dressing, as needed (recipe follows)
  • Sauerkraut, as needed

Preheat frying oil to 375F.  Combine dry ingredients. Combine wet ingredients, mixing to combine. Combine wet and dry ingredients, mixing thoroughly. Transfer batter to a tall container. Pat sausage dry with a paper towel and skewer onto stick or toothpicks. Dip sausages into batter, up to 1/4 inch onto the stick. While holding the stick, fry sausages until batter begins to set, about 10 seconds. Drop into oil and continue cooking until golden brown, about 4 minutes. Transfer to a paper towel-lined plate to drain. Top with Russian dressing and sauerkraut.

Russian Dressing
makes about 3/4 cup

  • Mayonnaise, 1/2 cup
  • American Chili Sauce, 1 tablespoon
  • Parsley, minced, 1 tablespoon
  • Yellow Onion, minced, 1 teaspoon
  • Horseradish, grated, 1/2 teaspoon
  • Worcestershire Sauce, 1/4 teaspoon
  • Kosher Salt and Black Pepper, to taste

Combine all ingredients. Allow to sit overnight or at least 12 hours.

Read Full Post »

Since probably the mid 80’s, Thai cuisine has seen an explosion of popularity, likely due to a booming post-war tourism industry in Southeast Asia. As all popular things do, Thai cuisine was quickly adopted as the trendy go-to cuisine in America, built to excess, and generally ruined. Don’t get me wrong, I love a good dish of Pad Thai as much as the next person might. But a vast difference can be found from one pad thai to another. Generally, when seeking out foreign cuisines, look for recipes that aren’t written in english.

Thailand is host to a litany of amazing dishes exemplifying the core four flavors of their cuisine: sweet, sour, salty, and spicy. One thing that people don’t necessarily think about, however (maybe I can’t speak for you, but I’ve really never considered it), is what breakfast looks like in this part of the world. Rice and noodles are all well and good, but when it comes to the most important meal of the day I’ll usually reach for something a bit more familiar.

IMG_5528

Pa Thong Ko are a Thai version of a traditional Chinese-style cruller. Crispy on the outside, light and airy on the inside; They’re almost more similar to the fried bread dough you’d get from a dirty cart at the county fair. Served with coconut jam (which is really a custard), you can see the influence from French colonialism, much the same way that the Banh Mi came about in Vietnam.

According to Thai tradition, the traditional X shaped fritters represent two inseparable lovers, always seen together. In stark contrast, Chinese tradition recounts a tale of two evil men who were put to death in boiling oil.

Pa Thong Ko, adapted from SheSimmers
makes 10-12 fritters

  • Bread Flour*, 260g
  • Active Dry Yeast, 2g
  • Baker’s Ammonia, 2g
  • Alum Powder, 1/2 teaspoon
  • Kosher Salt, 8g
  • Granulated Sugar, 14g
  • Warm Water, 170g (3/4 cup)
  • Vegetable Oil, 1 tablespoon, plus more as needed
  • Baking Powder, 4g

Combine all ingredients except baking powder in the bowl of a stand mixer fitted with a dough hook. Mix on medium speed for 8 minutes. Transfer to a lightly oiled bowl and lightly coat top of dough with oil. Cover with a towel and allow to rise 4-5 hours. Transfer dough to a lightly floured work surface and lightly dust flour over dough. Sprinkle baking powder over dough. Fold and knead about 4 times. Roll dough to 1/4 inch thickness. Cut to desired shapes.
In a heavy-bottomed pot, heat 4-5 inches of vegetable oil to 350F. Fry dough until deep brown and crispy, 1-2 minutes on each side. Transfer to a paper towel-lined plate to drain excess oil

*Yes, you can use All-Purpose flour

Sangkhaya (Coconut Jam/Custard)
makes just over 1 cup

  • Egg Yolk, large, 4 each
  • Palm Sugar, 3 tablespoons
  • Granulated Sugar, 5 tablespoons
  • Coconut Milk, full-fat, 3/4 cup plus 2 tablespoons
  • Dried Pandan Leaf**, about 1/4 cup
  • Kosher Salt, 1/8 teaspoon

Combine egg yolks and sugar in a medium-sized bowl. Whisk vigorously until thick and creamy. Meanwhile, heat coconut milk, pandan and salt in a heavy-bottomed pan over medium heat. While whisking, add 1/3 of the hot coconut milk to the egg yolk mixture. Continue whisking until full incorporated. While whisking, add egg mixture to remaining coconut milk. Continue cooking over medium heat, whisking very frequently, until sauce is thick, about 5-8 minutes. Once thick, immediately remove from heat, transfer sauce to a bowl or other container and refrigerate until cooled completely.

**If you can’t find pandan or don’t want to buy it, substitute 1/2 teaspoon of vanilla extract.

Read Full Post »

As you may or may not have noticed, I’ve been taking kind of a hiatus from my writing. As opposed to 2015 where I took an extended break to work through some personal issues, this was more from wanting to do new and exciting things. As I mentioned at the end of last year, I had a few different ideas about projects I wanted to work on and write about, so I wanted to step away from 52 Weeks of Cooking Challenge. I started working my way through the Mighty Marvel Superhero’s Cookbook, however after a few quick posts I realized that it really wasn’t stimulating in the way that I thought it would be. Part of what I really love about writing is that it gives me a chance to look into new topics or ideas that I may not have thought about before. Making pancakes and frying eggs really wasn’t pushing any boundaries.

So while I dropped that format, I really didn’t have anything to put into its place. I’ve buckled down at work and put out some really fun food, but I’ve still been wracking my brain for something that grabs my interest and makes me want to write again. I looked at the 52 Weeks Challenge subreddit just to see what had been going on in the couple months I hadn’t been participating and it immediately grabbed me the same way it did almost 4 years ago now. I’ve always felt like I do better work when I’m given a ball park to play in. A lot of times it’s hard for me to come up with something out of the blue, but if somebody says “What about [XYZ]?” it seems to get my creativity flowing in one direction or another. So, at least for now, I think I’ll pick back up where I left off. I’ve missed out on nearly half the year, but you’ve got to start somewhere.

The theme of the week is presentation: Practicing one of the most crucial aspects of cooking, certainly in the professional realm if not in the home. Presentation can be as simple or as complex as your ambition permits. It could be as easy as slicing a nicely cooked steak before putting it on the plate or a sprinkling of complementary herbs on top of a lasagna, or you can bust out the tweezers and pipettes a la Chef’s Table.

With little effort, it’s easy to make food look as good as it tastes. It also doesn’t take much make delicious food that doesn’t look at all appetizing. The real skill, it could be said, would be to take food that may not taste all that great and make it look irresistible. Chef Jacques La Merde became an Instagram sensation for that exact approach, and I felt it would only be fair to try my hand at it.

IMG_5465

For all intents and purposes, this is a Lunchable. Ham and Cheddar with Crackers, to be exact. Oscar Mayer ham, Kraft cheddar. I made the crackers myself, only because I had the ingredients and I was a little bit broke, but other than that it’s the same ingredients you’d find in the fridge in the bright yellow box. [Side note: When did they stop putting chocolates and candies in Lunchables? What the fuck?]

I did deviate slightly from an exact Lunchable, so I wasn’t entirely sure how much it would really evoke the childhood memories, but it really, really did. There’s something about the taste of low-quality ham and low-quality cheese that never really leaves your mind.

Cheddar Cheese Sauce, adapted from Chefsteps
makes 1.5 – 2 cups

Combine ingredients in a small sauce pot. Heat over low heat, stirring frequently, until cheese is fully melted, about 15 minutes.

Ritz-Style Crackers
makes 1 sheet

  • All-Purpose Flour, 2 cups
  • Baking Powder, 3 teaspoons
  • White Sugar, 1 tablespoon
  • Kosher Salt, 1/2 teaspoon, plus more as needed
  • Butter, unsalted, cold, 6 tablespoons
  • Vegetable Oil, 2 tablespoons
  • Cold Water, as needed
  • Egg, beaten, 1 each

Preheat oven to 400F. Add flour, baking powder, sugar, and salt to the food processor and pulse to combine. Add cold butter in small increments, and pulse to combine. With food processor running, add vegetable oil slowly. Add water a little bit at a time while pulsing, until dough just comes together. On a floured surface, roll dough out as thin as you can, adding more flour if needed when it sticks. Transfer dough to a parchment-lined baking sheet. Using a fork, poke holes across the entire dough. Brush dough with eggwash and sprinkle lightly with kosher salt. Bake 400F until crispy and lightly browned, rotating every 10 minutes, about 25 minutes. Allow to slightly before breaking into pieces.


Read Full Post »

Miso Horny

I’ve been waiting for that joke for so long you guys. Anyway…

The Greek philosopher Democritus claimed that, when chewed, food broke into four distinct shapes, with the size and shape of the pieces determining the taste: Large, round pieces were sweet, while small, round pieces were bitter. Salt was given by small, angular bits, and larger angular chunks were sour.

Until the late 19th century, it was assumed that these were the four basic tastes. Then along came chef Georges Auguste Escoffier. Known as the ‘king of chefs and the chef of kings’ Escoffier developed nearly in its entirety what we now know as classical French cuisine. By developing rich sauces and deeply roasted meat dishes, he made food that didn’t just taste good, but was the best food anyone had tasted; A flavor that wasn’t simply a combination of sweet, sour, salty and bitter. Just a few years after the publication of Escoffier’s Le Guide Culinaire, Japanese chemist Kikunae Ikeda noticed that dashi made with kombu, a type of seaweed, was especially more delicious or ‘yummy’ (in Japanese, umami) that those made without. By studying the chemical makeup of the kombu, Ikeda pinpointed the fifth taste.

Glutamic acid, known now as Umami, create the flavor of savory-ness “common to asparagus, tomatoes, cheese and meat” as Ikeda described. Think about the crust of freshly baked bread. Crispy, roasted mushrooms. Soy sauce. Steak, seared in a ripping-hot cast-iron skillet. It’s why brown food tastes so great. However, it’s difficult to create a dish that’s strictly tastes of umami. As with the other tastes, balance is the key.

img_4270

I find that one of the more interesting ways to utilize umami is in largely sweet products. In the same way that salt makes chocolate and caramel taste extraordinary, umami ingredients provide a truly unique contrast.

This week, I wanted to take a page from friend and queen of doughnuts Ren Weiner. Miso, a Japanese seasoning of fermented soy beans or other grains, is jam-packed with umami goodness, and plays quite well with rich, eggy doughnuts. The dough itself carries a smattering of white miso (also called yellow), which has a mild, smooth taste (I swear this isn’t a cigarette ad). Red miso, with a more intense, aggressive flavor gets blended with plain ol’ sugar to make a nice topping. My miso sugar didn’t really dry out like I had hoped it would, but was spectacular tasting nonetheless.

Miso Doughnuts, adapted from Bon Appetit

makes about 10 doughnuts

  • Red Miso, 1 tablespoon
  • Granulated Sugar, 3/4 cup plus 1 tablespoon, divided
  • Active Dry Yeast, 1 package (2 1/4 teaspoons)
  • Egg, whole, 1 each
  • Egg Yolk, 1 each
  • Butter, unsalted, melted, 3 tablespoons
  • Whole Milk, 3 tablespoons
  • White or Yellow Miso, 3 tablespoons
  • All-Purpose Flour, 2 cups, plus more as needed
  • Vegetable Oil, for frying

Pulse red miso and 1/2 cup sugar in a food processor until mixture resembles brown sugar. Spread out evenly on a parchment-lined  baking sheet and let sit until dry, 2−2 ½ hours. Pulse in food processor until no clumps remain. Transfer miso sugar to a bowl and set aside.

Combine 1 tablespoon sugar and 1/4 cup warm water in a small bowl. Sprinkle yeast over and let sit until foamy, 5−10 minutes.

Beat egg, egg yolk, butter, milk, white miso, and remaining 1/4 cup sugar in the bowl of a stand mixer with whisk attachment until smooth. Add yeast mixture and flour and mix until a loose ball forms.

Switch to dough hook and mix on medium until dough is smooth,  5−7 minutes. If dough is wet, add more all-purpose flour as needed.

Place dough in a large bowl lightly coated with nonstick spray. Cover and let sit in a warm place until nearly doubled in size, 1−2 hours.

Line a baking sheet with parchment paper; lightly flour. Turn out dough onto a lightly floured surface and pat out to 1″ thick. Punch out rounds with biscuit cutter. Repeat with scraps. Transfer rounds to prepared baking sheet, cover loosely, and let rise in a warm place until almost doubled in size, 45−60 minutes.

Pour 2 inches of oil into a large heavy saucepan. Heat over medium-high until thermometer registers 325°. Working in batches, fry doughnuts until deep golden brown, about 3 minutes per side. Transfer to paper towels and let cool slightly before tossing in miso sugar.

Read Full Post »

In America, Thanksgiving is kind of a big deal. Restaurants bust out catering pickups all week long, and the smarter of the home cooks begin their prep days in advance. I generally have a good gameplan for the gluttonous holiday (which was recently featured in State14!), but even the best laid plans can go awry due to weather, lost attention, or a host of other mishaps.

Today, as you may note, is not Thanksgiving. Today is the day after Thanksgiving. That means I just had one of the deepest sleeps I’ve had in weeks, and also that I’m nearly out of tupperware. As great as Thanksgiving is for bringing family together, sharing food and spending time with loved ones, the more practical application is packing your fridge with enough leftovers to last a good couple of weeks. The ultimate use of Thanksgiving remnants is to pack it all into a sandwich. I’ve said before that sandwiches are by far the best category of food, and I will continue saying that to my grave. This is the holiest of all sandwiches. I often tout my love of a classic Reuben as the best sandwich, but the Thanksgiving Leftover sandwich, saved for just one day of the year, is a beast all of its own. While I love that sandwich more than any other, I’ve written about it multiple times before (in 2012 and 2013), and wanted to push my creativity a bit this year.

Getting weird with your leftovers definitely isn’t a new idea. This year, I’ve seen my share of cool recipes: Egg Rolls, Burritos, Eggs Benedict, Pizza, Nachos; the possibilities are near endless. Serious Eats may get the trophy for their Stuffing Waffles, but I wanted to take it just a step further.

img_4181

As my southern friends will vouch for, chicken and waffles is truly an amazing combination. Sweet and savory, breakfast and lunch. Sneakers Bistro knows what’s up. I prefer to break down my turkey rather than roasting it whole, which left me with some big ol’ turkey wings to do something cool with: Sous vide until super tender (a la Modernist Cuisine), then fried with a crispy breading. The debate rages online as to whether gravy or maple syrup is the appropriate condiment for this behemoth, but being that I’m from Vermont I’m sure you can guess what side of the line I fall on. I like to mix some of the good stuff with my leftover cranberry sauce and a bit of Cholula.

Read Full Post »

When you talk about the origins of foods, it’s sometimes a difficult to task deciding where to look. For example, it’s pretty well known at this point that noodles and pasta were developed in Asia before making their way to Europe. However, we tend to more strongly associate that type of dish with Italian cuisine. They weren’t by any means the originators, but they certainly took the ball and ran it out.

Around the same time that pasta was being developed in China, about 4000 years ago, beer was being brewed in Sumer. Made from smoked barley bread and fermented date wine, it was a far cry from what we think of as beer today. So while that may be our earliest recollection of beer, the Czech really brought it into its own.

Břevnov Monastery in Prague has been brewing since 993CE, just over a thousand years of beer.  Cities such as Pilsen and Budweis (sound familiar?) have been brewing consistently since the 13th century, spawning arguably the most popular styles of beer in the world, Pilsner and Budweiser respectively. With greater consumption of beer per capita than anywhere else in the world, it’s often joked that beer is the national sport of the Czech Republic. And as with all major sports when your team is playing, if you’re hosting, it’s nice to have a good spread of snacks.

img_4098

In America, our beer snacks are usually laden with salt; popcorn, chips, pretzels, nuts. In the Czech Republic, it seems to be fairly different. Meats, cheeses and breads are common, likely to help absorb some alcohol and allow you to keep drinking long into the night. The most common of these kinds of snacks is Nakládaný hermelín (nahk-la-dan-ee her-mel-een). Hermelin is a soft cheese similar to camembert, marinated in spices, onions, garlic and oil. Pickled sausages are also common, and much to my surprise are far less gross than I imagined the ones in the jar at the gas station tasting. Smokey, fatty, and just a little bit of acid. I can definitely dig it.

Czech “Pickled” Cheese

  • Camembert, 1 wheel
  • Yellow Onion, thinly sliced, 1 each
  • Garlic, 4 cloves
  • Pickled Banana Peppers, sliced, 1/2 cup
  • Black Peppercorn, 1/2 teaspoon
  • Paprika, 1/2 teaspoon
  • Bay Leaf, 2 each
  • Thyme, fresh, 1 tablespoon
  • Kosher Salt, 1 teaspoon
  • Extra-Virgin Olive Oil, as needed

Cut cheese into small wedges or strips. Toss with remaining ingredients and transfer to a sealable container. Cover with olive oil and marinate at room temperature for 5-7 days, up to 6 weeks.

Pickled Sausage

  • Water, 4 cups
  • Cider Vinegar, 4 cups
  • Kosher Salt, 2 tablespoons
  • Bay Leaf, 2 each
  • Kielbasa, 1 large link

Combine water, vinegar, salt and bay leaf. Bring to a boil. Cut sausage into 4-6 small links. In a sealable container. pour pickling liquid over sausages and allow to cool to room temperature. Cover and store refrigerated at least 5-7 days.

Read Full Post »

Older Posts »